Getting started
Install CLEM, learn the four parts of its window, and build and run a first flow: one request with two checks, in about five minutes.
Install
| System | File | How |
|---|---|---|
| Windows 10 / 11 | CLEM-Setup-<version>.exe | Run it and follow the steps. The installer isn't code-signed yet, so Windows SmartScreen may say "Windows protected your PC": click More info → Run anyway. |
| Debian, Ubuntu | CLEM-<version>-amd64.deb | sudo apt install ./CLEM-<version>-amd64.deb (use apt, not dpkg -i, so dependencies come too). Start it from the menu (Development) or with clem. |
| Other Linux | CLEM-<version>-x86_64.AppImage | Make it executable and run it. Ubuntu 22.04+ needs libfuse2; on Ubuntu 23.10+ start it with --no-sandbox, or use the .deb. |
| macOS 13+ | CLEM-<version>-mac-arm64.zip (Apple Silicon) or -mac-x64.zip (Intel) | Unzip and move CLEM to Applications. The first time, macOS can't verify the developer: right-click CLEM → Open, or on macOS 15+ try once, then System Settings → Privacy & Security → Open Anyway. |
CLEM keeps everything on your computer: there is no account, no sign-in and no cloud. Flows are files in your workspace folder.
A first install also adds the example projects, Examples and Help: ready-made flows for every feature and for this guide (on Windows, untick Add the example projects to skip them).
Upgrading: install the new version over the old one. The Windows installer says which version is installed and what it will become, and warns before it installs an older one. Your projects, flows, environments, secrets and settings are kept, and the example projects are left as they are (Help → Update the example projects brings the new version's flows).
The window
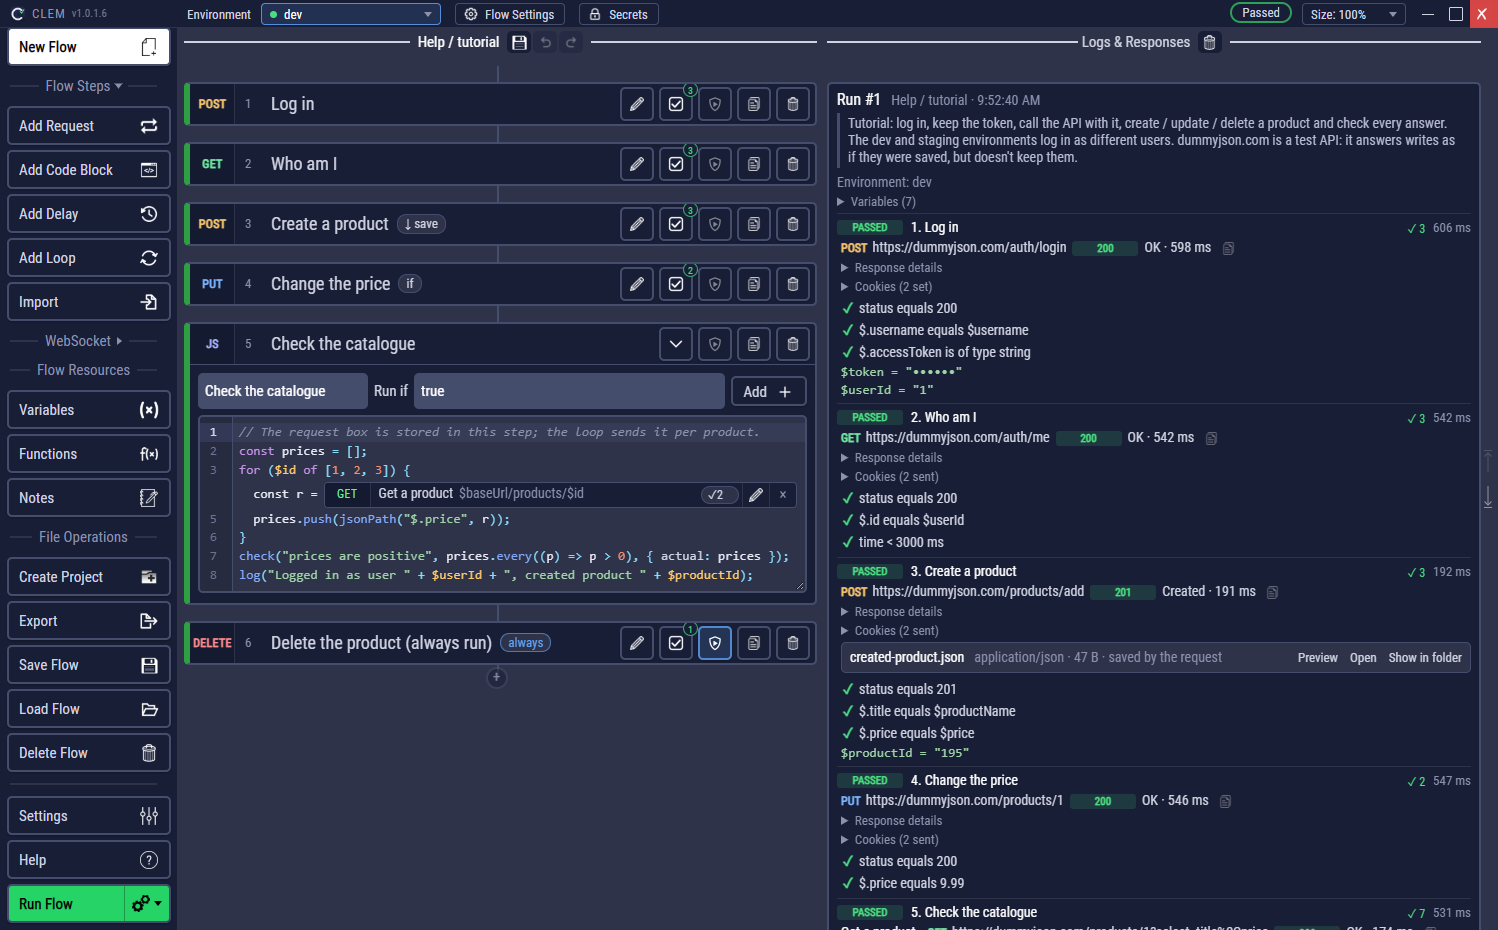
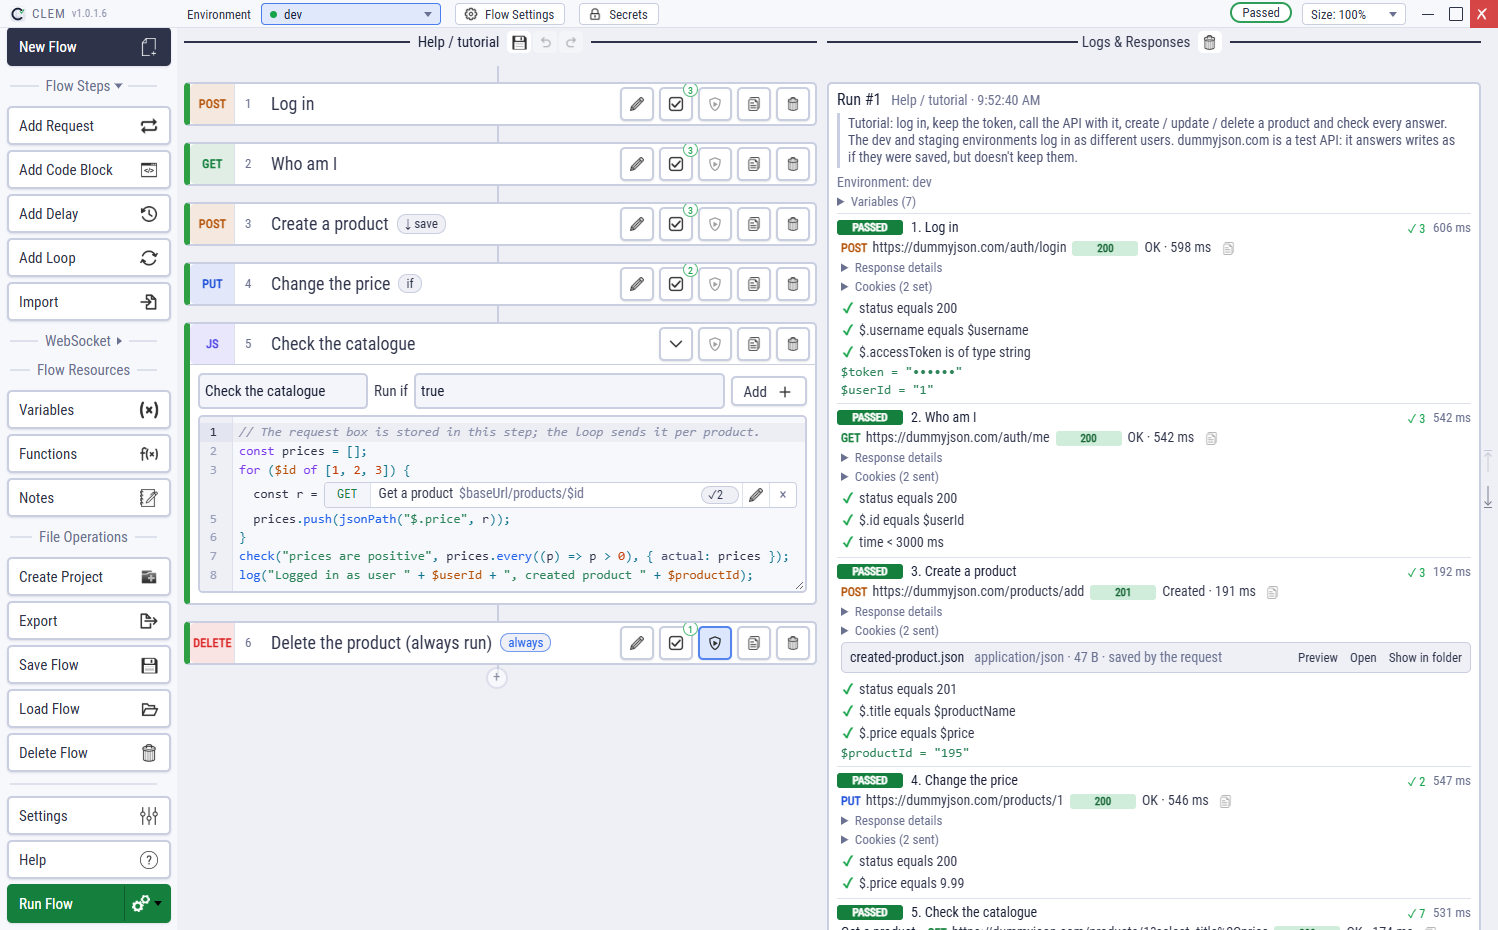
| Part | What it holds |
|---|---|
| Title bar | The flow's name (a • means unsaved changes), save, undo / redo, the environment picker, Secrets (the lock), Flow Settings (the gear) and the UI size. |
| Left menu | Add steps, in two sections that fold (one open at a time): Flow Steps (Add Request, Add Code Block, Add Delay, Add Loop, Import) and WebSocket (Add WebSocket, Wait for Message; WebSocket). Then the flow's Variables, Functions and Notes, files (New Flow, Create Project, Export, Save Flow, Load Flow…), Settings, Help, and Run Flow at the bottom. |
| Flow (middle) | The steps, top to bottom. Click one to edit it; hover between two steps and click + to insert one there. Each step's buttons copy, delete, add checks or make it always run. |
| Logs & Responses (right) | What each run did, step by step, with every request and response. Editors (a request, Variables, Settings…) open at the top of this column. |
Your first flow
We'll ask the free test API dummyjson.com for a product and check the answer. The finished flow is examples/Help/first-request.clem.json.
Click New Flow (Ctrl+N).
Click Variables, then Add Variable: name $baseUrl, value
https://dummyjson.com. Save. Variables keep the URL in one place; more about variables.Click Add Request. The request editor opens on the right. Give it a name (Get a product), keep the method
GETand type the URL$baseUrl/products/1.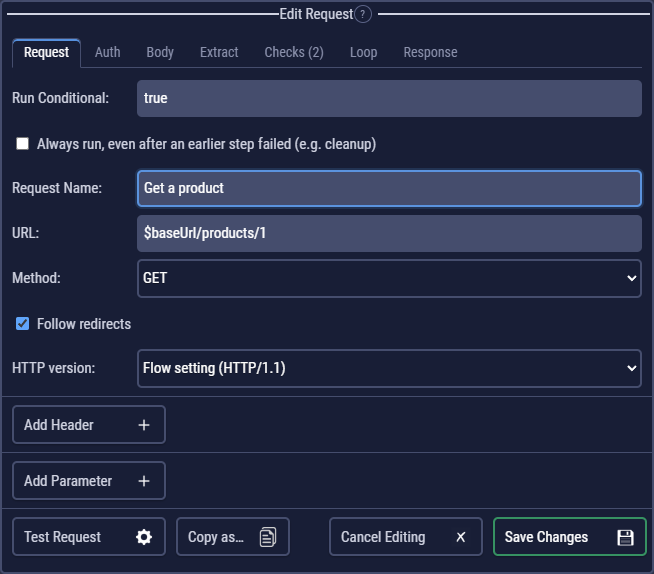
The request editor. The tabs along the top hold the request's auth, body, extraction, checks, loop and response options. Click Test Request. CLEM sends it once and shows the response below the editor, without running the flow. You should see status 200 and a JSON product.
Open the Checks tab and click Add Check twice: Status equals
200, and JSON path$.titleis of typestring. Checks are what make a request a test: all about checks.Click Save Changes, then Run Flow (F5). The step turns green and the log shows the request, its two passed checks and the response.
Save the flow with Save Flow (Ctrl+S): pick a project (or create one with Create Project) and a name.
Have a curl command already? Paste it into a request's URL field: CLEM fills in the method, URL, headers and body. Import from cURL.
Reading the log
Each run adds a block to Logs & Responses: the variables it started with, then one line per step marked PASSED, FAILED or SKIPPED. Under a request you see its status and time, its checks and Response details, which opens the request that was sent and the response with its headers and body (JSON and XML as trees, images and PDFs as previews). More about runs and logs.
Next steps
- Follow the tutorial: a complete test with login, a token, environments and CI.
- Bring what you have: import a Postman or Bruno collection, an OpenAPI description or a HAR file.
- Learn the keyboard shortcuts.